
Xamarin SDK
dvanced guide to set up the Xamarin SDK
Index
- 1. Configurable properties
- 2. Callbacks offered by the SDK
- 3. Manage device
- 4. Interest groups
- 5. Send custom events
- 6. In-App Messages
- 7. Collection of push data
- 8. Changelog
1. Configurable properties
In this section you will find a series of more advanced functionalities that require a more complex development. We recommend that a developer be in charge of this configuration.
1.1. Activate geolocated notifications
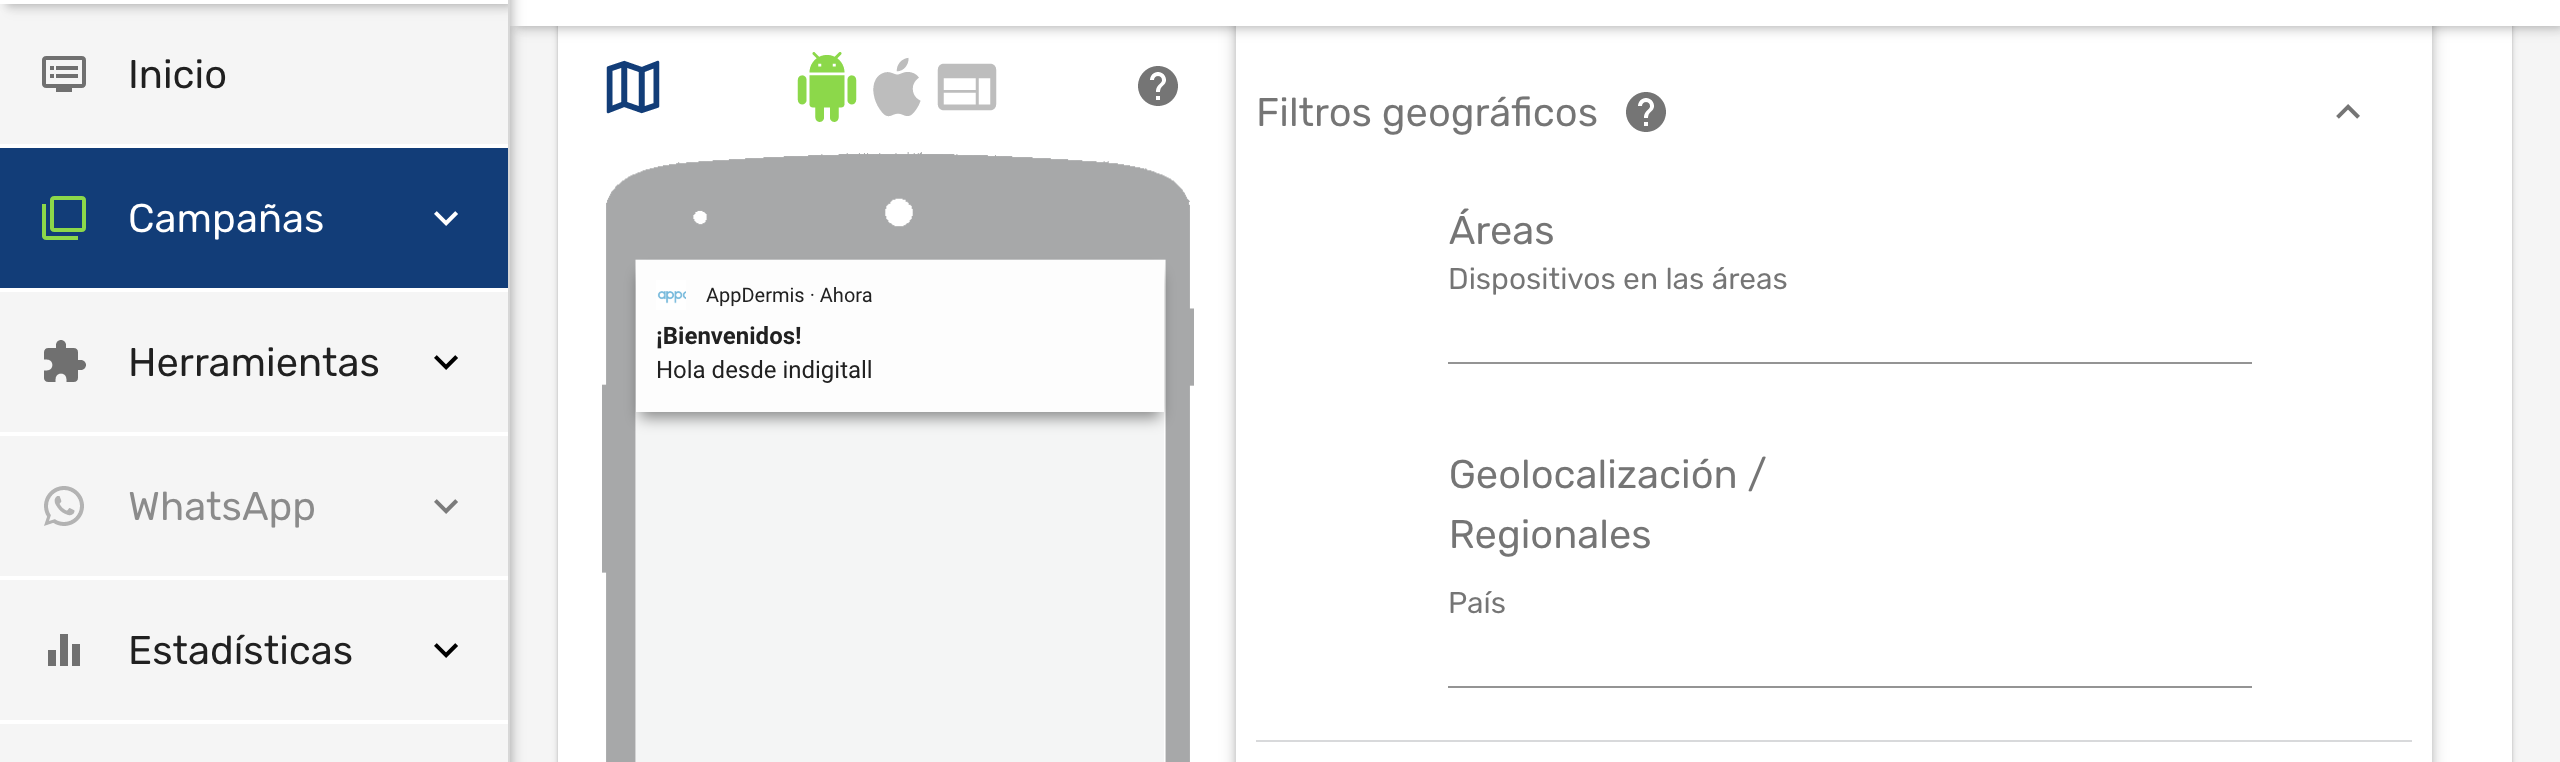
The indigitall SDK can manage the user's location. This allows you to use the location filters on the send push campaign screen ( Campaigns> Push> New push campaign </ a >> Filters> Geographical filters)
Once we have enabled this functionality, the end user will have to give their consent to the location permission and enable the location services of their smartphone, so that the application can obtain the exact location of the user.
1.1.1. Android
Add the location permissions by including this line in the AndroidManifest.xml file inside the Properties folder of the android project:
<uses-permission android:name="android.permission.ACCESS_FINE_LOCATION" />You have to add the RequestLocationPermission parameter when the SDK is initialized in the case of using Xamarin.Forms and mark with the requestPermissionLocation flag, in the case of using Xamarin Classics you only have to add the requestPermissionLocation flag. This is done using the following code excerpt:
//Xamarin.Forms
//When you want to initialize indigitall in global iOS project::Xamarin.Forms.Forms.Init(this, bundle);
  DependencyService.Register<Com.Indigitall.Xamarin.Android.Indigitall>();
  Com.Indigitall.Xamarin.Android.Utils.PermissionUtils.RequestLocationPermission(this);
  // otra forma de pdefinir el setdefault: this.ComponentName.ClassName

  var app = new App();
  LoadApplication(app);

...

  public override void OnRequestPermissionsResult(int requestCode, string[] permissions, [GeneratedEnum] Permission[] grantResults)
    {
        base.OnRequestPermissionsResult(requestCode, permissions, grantResults);
        Com.Indigitall.Xamarin.Android.Utils.PermissionUtils.OnRequestPermissionResult(this, requestCode, permissions, grantResults);

    }

  ------------
//Initialize the project
 var indigitall = DependencyService.Get<IIndigitall>();
  if (indigitall != null)
  {
      indigitall.Init("YOUR_APPKEY", "YOUR_SENDERID", true);
  }
  ------------

//Xamarin Classics
  Com.Indigitall.Xamarin.Android.Indigitall indigitall = new Com.Indigitall.Xamarin.Android.Indigitall();
  indigitall.Init("YOUR_APPKEY", "YOUR_SENDERID", true);
1.1.2. iOS
Add the following keys to the application's Info.plist file.
<key>NSLocationAlwaysAndWhenInUseUsageDescription</key>
<string>Can we always use your location?</string>

<key>NSLocationAlwaysUsageDescription</key>
<string>Can we always use your location?</string>

<key>NSLocationWhenInUseUsageDescription</key>
<string>Can we use your location when using the apps?</string>

<key>UIBackgroundModes</key>
    <array>
        <string>location</string>
        <string>remote-notification</string>
    </array>
Keys NSLocationAlwaysUsageDescription, NSLocationWhenInUseUsageDescription y _NSLocationAlwaysAndWhenInUseUsageDescription_can be customized by editing the content of the label < string >.
Add the following code in the AppDelegate inside the FinishedLaunching method
  DependencyService.Register<Com.Indigitall.Xamarin.iOS.Indigitall>();

  if (UIDevice.CurrentDevice.CheckSystemVersion(10, 0))
  {
      // iOS 10 or later
      var authOptions = UNAuthorizationOptions.Alert | UNAuthorizationOptions.Badge | UNAuthorizationOptions.Sound;
      UNUserNotificationCenter.Current.RequestAuthorization(authOptions, (granted, error) =>
      {
          if (granted)
          {
              InvokeOnMainThread(() =>
              {
                  UIApplication.SharedApplication.RegisterForRemoteNotifications();
              });
          }
      });

      // For iOS 10 display notification (sent via APNS)
      UNUserNotificationCenter.Current.Delegate = new Com.Indigitall.Xamarin.iOS.UserNotificationCenterDelegate();

  }
  else
  {
      // iOS 9 or before
      var allNotificationTypes = UIUserNotificationType.Alert | UIUserNotificationType.Badge | UIUserNotificationType.Sound;
      var settings = UIUserNotificationSettings.GetSettingsForTypes(allNotificationTypes, null);
      UIApplication.SharedApplication.RegisterUserNotificationSettings(settings);
  }
1.2. Set the default Activity (Android)
The Activity by default is the initial screen of your app that is launched when a user clicks on a notification that does not have a deeplink. It is also the point where you should initialize the SDK. It is set by the parameter DefaultActivity:
//When you want to start indigitall
  Com.Indigitall.Android.Indigitall.SetDefaultActivity(this, Java.Lang.Class.FromType(typeof("YOUR_ACTIVITY")).Name);

  //or also
  Com.Indigitall.Xamarin.Models.IConfiguration config = new Com.Indigitall.Xamarin.Models.IConfiguration();
  config.appKey = "<YOUR-APP-KEY>";
  config.senderId = "<YOUR-SENDER-ID>";
  config.defaultActivity = Java.Lang.Class.FromType(typeof(MainActivity)).Name;
  indigitall.Init(config)
1.3. Associate the device with a user
You can associate your own ID to each device. In this way it will be easier and more intuitive for you to work with our tool. For example:
- If your users have been identified, you could use your user ID, or email, or any other data that you are used to working with.
- If your users are anonymous because they have not logged into the app, you may have a Google Analytics or Commscore metric system. You could use the ID provided by these tools.
To make this association between your custom ID (externalId), and the identifier handled by indigitall (deviceId), you have to invoke the setExternalCode method:
//Remember to put your external code here
indigitall.SetExternalCode("YOUR_EXTERNAL_CODE", (device) =>
{
    //Log device
}, (code, message) =>
{
    Console.WriteLine("SetExternalCode.iOS error code:" + code + " message: " + message);
});
Do not worry about anything. Your IDs are irreversibly encrypted on the phone itself and sent securely to our servers. Not even the indigitall team can know this information.
1.4. WiFi filter
If it is required to collect the user's WiFi information, in addition to the Indigitall panel configuration, you must add the parameter wifiFilterEnabled when the SDK is initialized:
indigitall.Init("YOUR APPKEY", "YOUR SENDER ID", requestLocation: true, wifiFilterEnabled: true)

//or also
  Com.Indigitall.Xamarin.Models.IConfiguration config = new Com.Indigitall.Xamarin.Models.IConfiguration();
  config.appKey = "<YOUR-APP-KEY>";
  config.senderId = "<YOUR-SENDER-ID>";
  config.requestLocation = true;
  config.wifiFilterEnabled = true;
  config.layoutBasic = Com.Indigitall.Xamarin.Models.Layoutbasic.Custom;
indigitall.Init(config)-
The location permission must be accepted by the user
-
Please note that the WiFi scan time when the app is in the background or closed may be inaccurate.
1.4.1 Android permits
In order to obtain the Wi-Fi information in android, the following permissions and services declared in the manifest are needed:
  <uses-permission android:name="android.permission.ACCESS_FINE_LOCATION" />
  <uses-permission android:name="android.permission.ACCESS_COARSE_LOCATION" />
  <uses-permission android:name="android.permission.ACCESS_BACKGROUND_LOCATION"/>

  <uses-permission android:name="android.permission.CHANGE_WIFI_STATE"/>
  <uses-permission android:name="android.permission.ACCESS_WIFI_STATE"/>

  // ANDROID 12 WIFI
  <uses-permission android:name="android.permission.CHANGE_NETWORK_STATE"/>
  <uses-permission android:name="android.permission.ACCESS_NETWORK_STATE"/>

//WiFi service
<service
    android:name="com.indigitall.android.services.WifiStatusService"
    android:permission="android.permission.BIND_JOB_SERVICE" >
</service>

<receiver android:name="com.indigitall.android.receivers.WifiWakeLockReceiver">
    <intent-filter>
        <action android:name="AlarmReceiver.Action.NETWORK_ALARM" />
    </intent-filter>
</receiver>
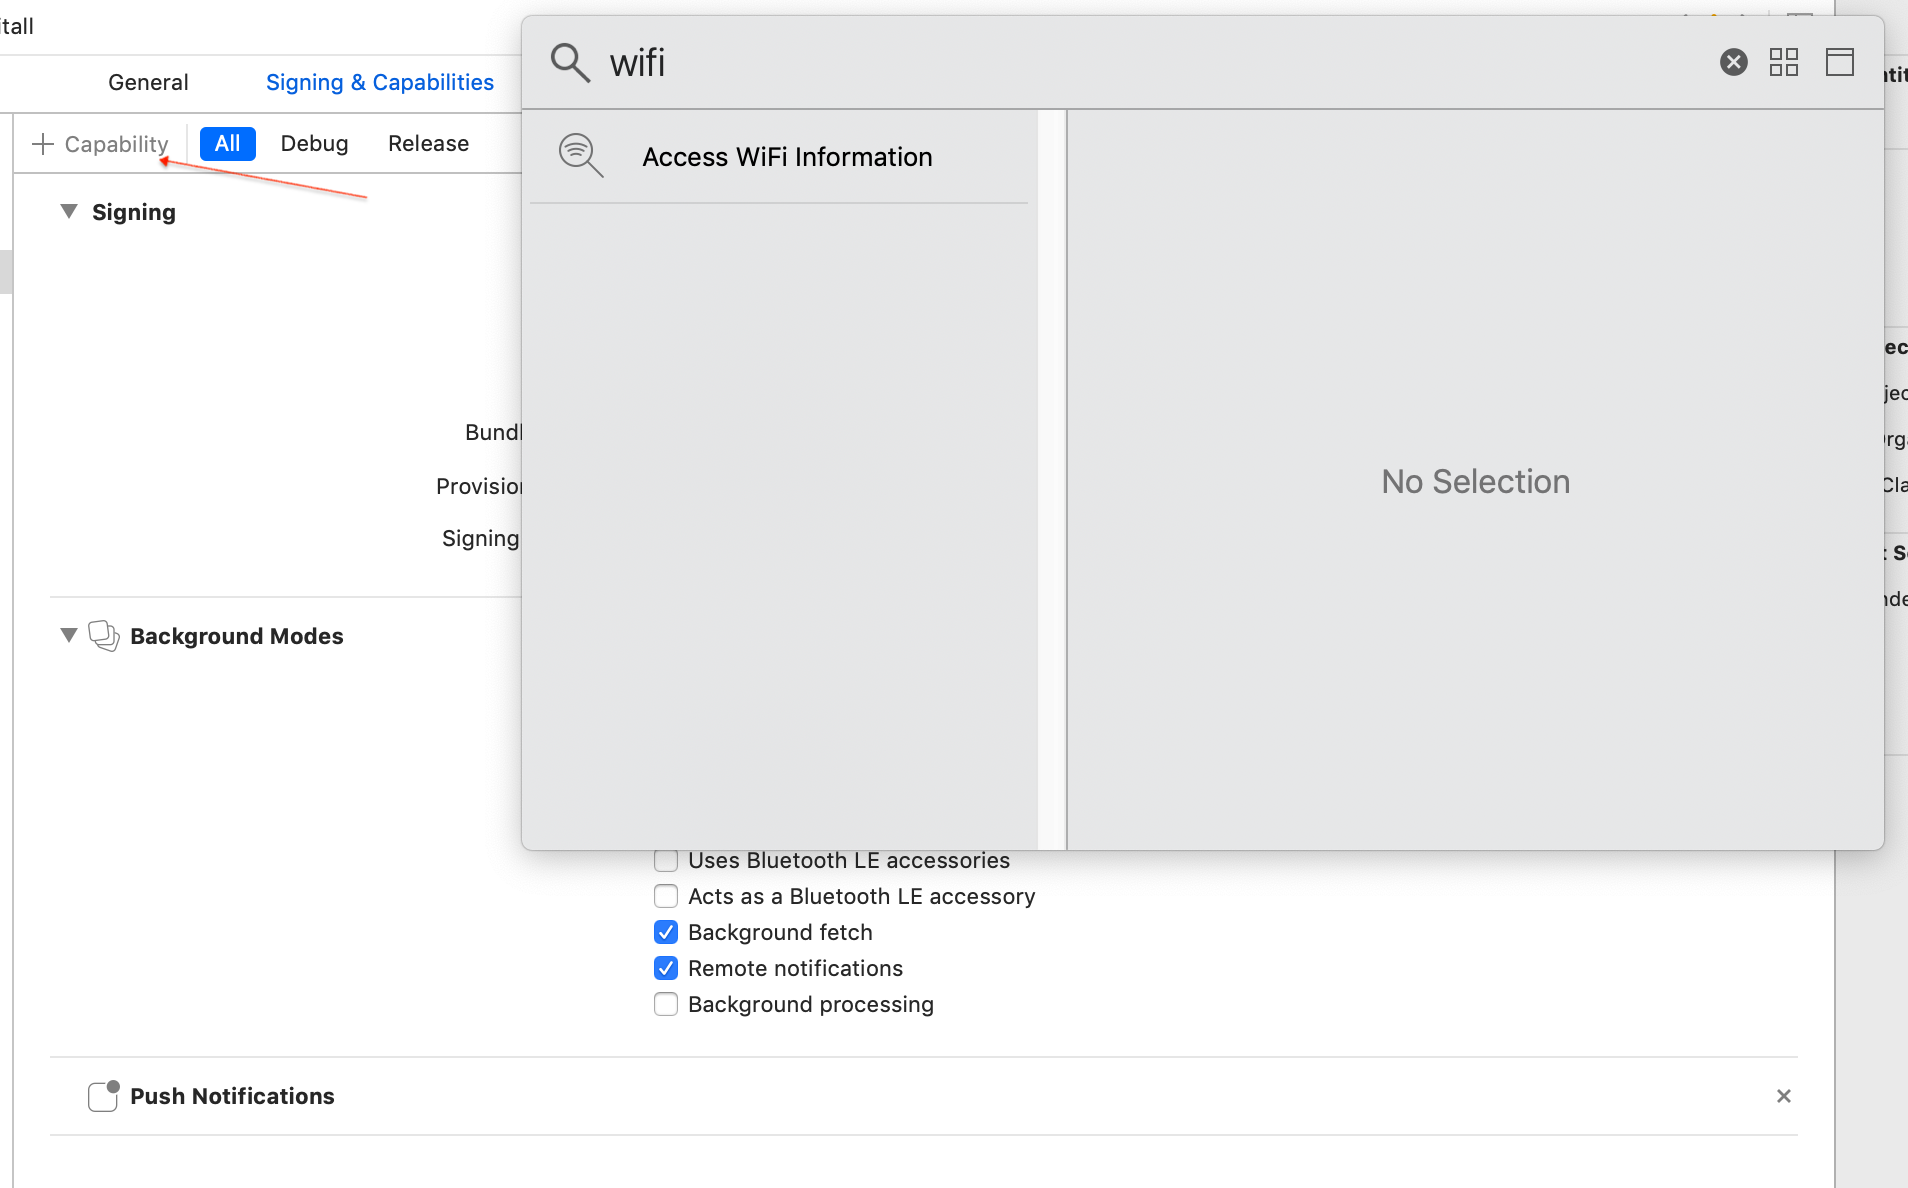
1.4.2 iOS permits
Likewise, you must add in the project options in Xcode, in Signing & Capabilities the option Access WiFi Information :
1.5. Layout custom
If for some reason you don't want to show the push as the native android sample, we leave this option to show the push with our custom layout . To do this add the following code in the init call:
indigitall.Init("YOUR APPKEY", "YOUR SENDER ID", requestLocation: true, wifiFilterEnabled: true, customBasic: "custom")

//or also
  Com.Indigitall.Xamarin.Models.IConfiguration config = new Com.Indigitall.Xamarin.Models.IConfiguration();
  config.appKey = "<YOUR-APP-KEY>";
  config.senderId = "<YOUR-SENDER-ID>";
  config.logDebug = false;
  config.layoutBasic = Com.Indigitall.Xamarin.Models.Layoutbasic.Custom;
  indigitall.Init(config);
- Remember that as of android 10, the custom layout will cause problems in displaying images if the mobile has dark mode activated. If the custom layout is not indicated, it will be displayed in native mode
1.6. Custom domain
if you are ENTERPRISE CUSTOMER you have to add this parameter in the configuration so that the SDK points to the correct environment:
Com.Indigitall.Xamarin.Models.IConfiguration config = new Com.Indigitall.Xamarin.Models.IConfiguration();
config.appKey = "<YOUR-APP-KEY>";
config.senderId = "<YOUR-SENDER-ID>";
config.urlDeviceApi = "https://device-api.indigitall.com/v1";
config.urlInAppApi = "https://inapp-api.indigitall.com/v1";
indigitall.Init(config)
2. Callbacks offered by the SDK
Our SDK offers various callbacks that help you have greater control of the execution flow and implement custom behaviors.
2.1. Initialized SDK
The onIndigitallInitialized method will run when the SDK finishes initializing and the device is ready to receive notifications from indigitall.
Receive as parameter:
- An array of Permission objects. The first item is the status of the claims permission. The second item is the status of the locate permission.
- A Device object with the information associated with the device.
Here is an example that prints logs about the status of permissions and device information.
var indigitall = DependencyService.Get<IIndigitall>();
if (indigitall != null)
{
    indigitall.Init("YOUR APPKEY", "YOUR SENDER ID", true, (permissions, device)=>
    {
        Console.WriteLine("device: " + device.deviceId);
        Console.WriteLine("device: " + permissions);
    },(device)=>
    {
        //DO SOMETHING
    },(errorCode,errorMessage)=>
    {
        //DO SOMETHING
    });

//or also
Com.Indigitall.Xamarin.Models.IConfiguration config = new Com.Indigitall.Xamarin.Models.IConfiguration();
config.appKey = "<YOUR-APP-KEY>";
config.senderId = "<YOUR-SENDER-ID>";
indigitall.Init(config, (permissions, device) =>
{
    Console.WriteLine("device: " + device.deviceId);
    Console.WriteLine("device: " + permissions);
}, (device) =>
{
    //DO SOMETHING
}, (errorCode,errorMessage) =>
{
    //DO SOMETHING
});
/>
2.2. New registered device
The onNewUserRegistered method will be executed when the device has been registered for the first time, that is, in the first execution of the app after being installed.
It receives as a parameter the Device object with the information associated with the device.
var indigitall = DependencyService.Get<IIndigitall>();
if (indigitall != null)
{
    indigitall.Init("YOUR APPKEY", "YOUR SENDER ID", true, (permissions, device)=>
    {
        //DO SOMETHING
    },(device)=>
    {
        Console.WriteLine("device: " + device.deviceId);
    },(errorCode,errorMessage)=>
    {
        //DO SOMETHING
    });
2.3. An error has occurred
The onErrorInitialized method will be executed only if an error occurs during the initialization of the SDK.
It receives the description of the error as a parameter.
var indigitall = DependencyService.Get<IIndigitall>();
if (indigitall != null)
{
    indigitall.Init("YOUR APPKEY", "YOUR SENDER ID", true, (permissions, device)=>
    {
        //DO SOMETHING
    },(device)=>
    {
        //DO SOMETHING
    },(errorCode,errorMessage)=>
    {
        Console.WriteLine("ErrorCode: " + errorCode+" Message: "+ errorMessage);
    });
3. Manage device
3.1. Check device information and status
You can use the deviceGet method to get the information that the SDK has recorded regarding the device.
The callback will receive as a parameter the device object that contains all the information associated with the device.
indigitall.DeviceGet((device) =>
{
    if (device != null)
    {
        Console.WriteLine("Device: " + device.deviceId);
    }
},(errorCode,errorMessage)=>
    {
        Console.WriteLine("ErrorCode: " + errorCode+" Message: "+ errorMessage);
    });
3.2. Enable / disable device
You can choose to disable the device to block the receipt of notifications. It is a very useful method to:
- Implement a preferences screen so that the user can enable / disable the receipt of notifications.
- Avoid receiving notifications if the user has not logged in, or has not accepted the terms of use, etc.
- Manage the Robinson List .
To do this, you have the deviceEnable and deviceDisable methods.
The callback will receive as a parameter the device object that contains all the information associated with the device.
indigitall.DeviceEnable((device)=>{
        Console.WriteLine("Device: " + device.deviceId);
  },(errorCode,errorMessage)=>
    {
        Console.WriteLine("ErrorCode: " + errorCode+" Message: "+ errorMessage);
    });

indigitall.DeviceDisable((device)=>{
        Console.WriteLine("Device: " + device.deviceId);
  },(errorCode,errorMessage)=>
    {
        Console.WriteLine("ErrorCode: " + errorCode+" Message: "+ errorMessage);
    });
4. Interest groups
Our SDK allows you to classify users into different customizable groups. This is very useful for:
- Implement a preferences screen so that the user can choose the topics for which they want to receive notifications.
- Label according to the navigation or actions that the user performs.
- Segment communications according to whether the user has identified or is anonymous.
- Segment based on language, culture, customer category, or based on any other criteria you need.
Remember that you must first define the groups you want to work with in the indigitall console ( Tools> Interest groups </ a>). See our user manual for more info.
4.1. List groups
Use the topicsList method to get the list of groups that are configured in your indigitall project. The callback of this method receives as a parameter an array of Topics, which contains the information of all the available groups, as well as a flag that indicates whether the user is included in any of them.
  indigitall.TopicsList((topic) =>
  {
      //DO SOMETHING
  }, (errorCode, messageError) =>
  {
      //Log error
  });
4.2. Manage subscription
To manage the device subscription to one or more groups, there are two methods: topicsSubscribe and topicsUnsubscribe .
Optionally, both receive a TopicsCallback object as the third parameter, which will return the list of all Topic in the project.
//topics typeof string[]
  indigitall.TopicsSubscribe(topics, (topic) =>
  {
      //DO SOMETHING
  }, (errorCode, messageError) =>
  {
      //Log error
  });

  indigitall.TopicsUnsubscribe(topics }, (topic) =>
  {
     //DO SOMETHING
  }, (errorCode, messageError) =>
  {
      //Log error
  });
5. Send custom events
Your app can send information to indigitall's servers to identify the actions and events that happen in it. This allows you to automate retargeting actions.
To register these events you have to call the sendCustomEvent method, passing a descriptive ID as a parameter (you can invent the one you like best) and set data you need.
The data must be added in an array of the INHashMap model like the one in the example indicated below.
Com.Indigitall.Xamarin.Models.INHashMap[] iNHashMap = new Com.Indigitall.Xamarin.Models.INHashMap[2];
iNHashMap[0] = new Com.Indigitall.Xamarin.Models.INHashMap("key1", "value1");
iNHashMap[1] = new Com.Indigitall.Xamarin.Models.INHashMap("key2", "value2");

indigitall.SendCustomEvent("YOUR_CUSTOM_EVENT", iNHashMap, () =>
{
    // Do something in success function
}, (ErrorDescription) =>
{
    //ERROR DO SOMETHING
});
6. In-App Messages
If you want to integrate the In-App messages in your application, you can do it with several complementary formats:
- Banner. Static content that is always visible, but allows the user to continue using the application.
- Popup. Full screen content that forces the user to click or discard the information.
6.1. Banner format
Below we tell you how to instantiate one or more In-App messages in banner format.
Remember that you should first have them defined in the indigitall console. See our user manual for more info.
Define a hybridWeview in the .xml file. The size must match what you have defined in the indigitall console ( Tools> In-App / In-Web Schemas ). Remember to translate the units from PX to _inches.
//160 units is 1 inch. 64 units is 1 cm
<local:HybridWebView x:Name="hybridWebView" InAppId="Billboard"  WidthRequest="x" HeightRequest="y"/>
Instantiate In-App messages using the ShowInApp method.
iindigitall.ShowInApp(webViewHybrid, "INAPP_CODE", (inAppCode, webView, showTime) =>
  {
    //onShowTimeFinished
  }, () => {
    //did clicked
  }, (code, message) =>
  {
    //did expired
  }, (code, message) =>
  {
    //did click out
  }, (code, message) =>
  {
    //did show more
  }, (inAppId, webview) =>
  {
    //DO SOMETHING
  },(inAppId, webview, errorMessage)=>
  {
    //LOG ERROR
  });
6.1.1. Android Xamarin Classics
Create a WebView view in your layouts. The size must match what you have defined in the indigitall console ( Tools> In-App / In-Web Schemas ). Remember to translate the units from PX to DP.
<android.webkit.WebView
    android:id="@+id/myBanner"
    android:layout_width="230dp"
    android:layout_height="33.33dp"
/>
<android.webkit.WebView
    android:id="@+id/otherBanner"
    android:layout_width="250dp"
    android:layout_height="36dp"
/>
Instantiate In-App messages using the showInApp method.
var myBanner = FindViewById<Android.Webkit.WebView>(Resource.Id.myBanner);
var otherBanner = FindViewById<Android.Webkit.WebView>(Resource.Id.otherBanner);

  var views = new List<Android.Webkit.WebView>();
  views.Add(myBanner);
  views.Add(otherBanner);

  var codes = new List<>();
  codes.Add("myBanner_CODE");
  codes.Add("otherBanner_CODE");

Indigitall.showInApp(getContext(), codes, views, new ShowInAppCallback() {
    @Override
    public void onLoad(String inAppCode, WebView webView) {
        Log.d("In-App loaded: ", inAppCode);
    }
    @Override
    public void onFail(String inAppCode, WebView webView, String message) {}

    @Override
    public void didDismissed(String inAppCode, WebView webView) {
        super.didDismissed(inAppCode,webView);
        Log.d("InApp didDismissed " + inAppCode);
    }
});
6.1.2. iOS Xamarin Classics
Create a WebView view on the storyBoard. The size must match what you defined in the indigitall console ( Tools > In-App / In-Web Schemas ). Remember to translate the units from PX to iOS points.
Instantiate In-App messages using the method, whether you want to show one inapp or several of them.
IndigitallXamarin.Indigitall.ShowInApp(uiWebviewIos, "Billboard", (inAppId, webView) =>
  {
      // DO SOMETHING
  }, (inAppId, webView, message) =>
  {
      // DO SOMETHING
  },()=>{
    //DidDismissed: DO SOMETHING
  });

  var views = new List<UIView>();
  views.Add(myBanner);
  views.Add(otherBanner);

  var codes = new List<>();
  codes.Add("myBanner_CODE");
  codes.Add("otherBanner_CODE");

  IndigitallXamarin.Indigitall.ShowMultipleInApp(views, codes, (inAppId, webView) =>
  {
      // DO SOMETHING
  }, (inAppId, webView, message) =>
  {
      // DO SOMETHING
  }, (inApp, webView) =>{
      //DidDismissed: DO SOMETHING
  });
6.2. Popup format
Next we tell you how to instantiate an In-App message in popup format.
Remember that you should first have it defined in the indigitall console. See our user manual for more info.
Instantiate the In-App messages from the hybridWebView using the ShowPopUp method.
indigitall.ShowPopUp(view, "INAPP_CODE", (inAppId, webview) =>
    {
    //DO SOMETHING
    },(inAppId, webview, errorMessage)=>
    {
    //LOG ERROR
    }, () =>
    {
        Console.WriteLine("DidClick");
    }, () =>
    {
        Console.WriteLine("DidClose");
    }, () =>
    {
        Console.WriteLine("DidDismissed");
    });

  //In the event that you want to customize the close icon of the Popup,
  //you can use the following method, in which you add a custom UIButton, or use the ** closeIconDisabled ** variable to show none:

indigitall.ShowPopUp(view, "INAPP_CODE", myIcon, false, () =>
    {
        Console.WriteLine("DidClick");
    }, () =>
    {
        Console.WriteLine("DidClose");
    }, () =>
    {
        Console.WriteLine("DidDismissed");
    }, (inAppCode, showTime)=>{
        Console.WriteLine("OnShowTimeFinished");
    }, (code, message) =>
    {
      //did expired
    }, (code, message) =>
    {
      //did click out
    }, (code, message) =>
    {
      //did show more
    }, (inAppId, webview) =>
    {
    //DO SOMETHING
    },(inAppId, webview, errorMessage)=>
    {
    //LOG ERROR
    });
6.2.1. Android Xamarin Classics
Create a WebView view in your layouts. The size must match what you have defined in the indigitall console ( Tools> In-App / In-Web Schemas ). Remember to translate the units from PX to DP.
var view = findViewById(R.id.myPopup)

Indigitall.ShowPopUp(view, getContext(), "myPopup_CODE", new ShowInAppCallback() {
    @Override
    public void onLoad(String inAppCode, WebView webView) {
        Log.d("In-App loaded: ", inAppCode);
    }
    @Override
    public void onFail(String inAppCode, WebView webView, String message) {}
});

//In the event that you want to customize the close icon of the Popup, you can
//use the following method, in which you add a custom UIButton, or use the ** closeIconDisabled ** variable to show none:

Indigitall.ShowPopUp(view, getContext(), "myPopup_CODE", myIcon, false, new ShowInAppCallback() {
    @Override
    public void onLoad(String inAppCode, WebView webView) {
        Log.d("In-App loaded: ", inAppCode);
    }
    @Override
    public void onFail(String inAppCode, WebView webView, String message) {}
    @Override
    public void onShowTimeFinished(String inAppCode, WebView webView, int showTime) {}
});
6.2.2. iOS Xamarin Classics
Create a WebView view on the storyBoard. The size must match what you defined in the indigitall console ( Tools > In-App / In-Web Schemas ). Remember to translate the units from PX to iOS points.
IndigitallXamarin.Indigitall.ShowPopup("myPopup_CODE", () =>
  {
    // DO SOMETHING didAppear
  }, () =>
  {
    // DO SOMETHING didCancel
  }, () =>
  {
    // DO SOMETHING didClicked
  }, () =>
  {
    // DO SOMETHING didDismissed
  }, (inApp, showTime) =>
  {
    // DO SOMETHING onShowTimeFinished
  },(error)=> {
    //Log Error
  });

//In the event that you want to customize the close icon of the Popup,
//you can use the following method, in which you add a custom UIButton, or use the ** closeIconDisabled ** variable to show none:

IndigitallXamarin.Indigitall.ShowPopup("myPopup_CODE", myIcon, false, () =>
  {
    // DO SOMETHING didAppear
  }, () =>
  {
    // DO SOMETHING didCancel
  }, () =>
  {
    // DO SOMETHING didClicked
  }, () =>
  {
    // DO SOMETHING didDismissed
  }, (inApp, showTime) =>
  {
    // DO SOMETHING onShowTimeFinished
  },(error)=> {
    //Log Error
  });
6.3. InApp Utilities
In the event that you want to show the InApp scheme in a different way to how our SDK paints it, we put at your disposal some methods so that you can customize the "painting", without affecting the statistics or the InApp functionalities.
InApp object pickup
indigitall.GetInApp("YOUR_INAPP_CODE", (inApp) =>
  {
      //do something
  }, (message) =>
  {
    //log error
  });
Check if the InApp should be displayed
Thanks to the InApp functionalities, it is possible to indicate that the inApp is displayed or pressed a maximum number of times, or if in the case of the popUp, after performing an action , such as pressing the close button, is not shown again. To do this we could do the following within the inAppGet method that we have seen previously:
indigitall.InAppWasShownWithInApp(inApp, () =>
{
    //didExpired
}, () =>
{
    //did show more
}, () =>
{
    //did clickout
}, () =>
{
    //show inapp
});
Actions to count clicks or to not show InApp anymore
For the case of what we call Dismiss Forever, once the action is performed, this method must be called:
indigitall.AddNewInAppToDismissForever(inApp);
In the event that you want to show an inApp only if you make 'x' clicks or clicks on it, you must add the following:
indigitall.InAppWasClicked(inApp, intent);
- In this method the statistics of the click are sent, not just the click counter.
7. Collection of push data
In the event that you want to obtain the push object of type json to perform checks and / or when the user clicks on the notification and it is with the action of open app, we leave you this code that will help to obtain it:
7.1. Android
In the case of Android we must add this code in the MainActivity and parse it as a push object to obtain the information:
var pushExtra = Com.Indigitall.Android.Models.Push.ExtraPush;
    if (Intent != null && Intent.GetStringExtra(pushExtra) != null)
    {
        Com.Indigitall.Android.Models.Push push = new Com.Indigitall.Android.Models.Push(Intent.GetStringExtra(pushExtra));
        Console.WriteLine("Push object: ", push);
    }
7.2. iOS
In the case of iOS we must add this code in the AppDelegate of the application, both in the DidReceiveRemoteNotification method for the main action, and for the HandleAction method for the button action:
//class extends UNUserNotificationCenterDelegate
[Export("userNotificationCenter:didReceiveNotificationResponse:withCompletionHandler:")]
    public override void DidReceiveNotificationResponse(UserNotifications.UNUserNotificationCenter center, UserNotifications.UNNotificationResponse response, Action completionHandler)
    {
        IndigitallXamarin.Indigitall.HandleWithResponse(response, (push, action) =>
        {
            Console.WriteLine("DidReceiveNotificationResponse push: " + push);
            Console.WriteLine("DidReceiveNotificationResponse action: " + action.App);
        });
    }

//DidReceiveRemoteNotification
Com.Indigitall.Xamarin.iOS.Indigitall.HandleActionPush(userInfo, null, (push, action) => {
                Console.WriteLine("DidReceiveRemoteNotification push: " + push);
                Console.WriteLine("DidReceiveRemoteNotification action: " + action.app);
            });

//HandleAction
Com.Indigitall.Xamarin.iOS.Indigitall.HandleActionPush(remoteNotificationInfo, actionIdentifier, (push, action) => {
                Console.WriteLine("HandleAction push: " + push);
                Console.WriteLine("HandleAction action: " + action.app);
            });
7.3. Register statistics if the Push action is involved
If you decide to treat the Push action independently without going through our SDK, in order to record the statistics you must do the following depending on the platform.
7.3.1. Android
In the case of Android, the intent of the action is collected in your activity where the ServiceUtils.RegisterStatistics method should be called. For this case, you can, for example, create a class that extends from our PushNotification to generate the intent with the following extras:
public class PushNotification : Com.Indigitall.Android.Models.PushNotification
    {
        Push push;
        Context context;

        public PushNotification(Push push): base(push)
        {
            this.push = push;
        }
        public override void ShowNotification(Context context)
        {
            this.context = context;
            base.ShowNotification(context);
        }
    protected override PendingIntent GetIntent(PushAction action, int clickedButton){
      Intent intent = action.GetIntent(context);
      Intent indigitallIntent;
      indigitallIntent = new Intent(context, typeof(MainActivity));
      indigitallIntent.SetFlags(ActivityFlags.NewTask);
      indigitallIntent.PutExtra(Com.Indigitall.Android.Services.StatisticService.ExtraAppKey, Com.Indigitall.Android.Commons.Utils.PreferenceUtils.GetAppKey(context));
      indigitallIntent.PutExtra(Com.Indigitall.Android.Services.StatisticService.ExtraPushId, push.Id);
      indigitallIntent.PutExtra(Com.Indigitall.Android.Services.StatisticService.ExtraClickedButton, clickedButton);
      indigitallIntent.PutExtra(Com.Indigitall.Android.Services.StatisticService.ExtraIntentAction, intent);
      indigitallIntent.PutExtra(Push.ExtraPush, push.ToString());
      if (action.GetTopics() != null && action.GetTopics().Length > 0)
      {
          indigitallIntent.PutExtra(Com.Indigitall.Android.Services.StatisticService.ExtraActionTopics, action.TopicsToString());
      }
      TaskStackBuilder stackBuilder = TaskStackBuilder.Create(context);
      stackBuilder.AddNextIntentWithParentStack(indigitallIntent);

      return stackBuilder.GetPendingIntent((push.Id * 10) + clickedButton,
                  PendingIntentFlags.OneShot);
    }
Once the push has been collected, as explained in the previous section, the following method must be called to register statistics:
Com.Indigitall.Android.Utils.ServiceUtils.RegisterStatistics(context, indigitallIntent);7.3.2. iOS
In the case of iOS in the userNotificationCenter: didReceive method of the AppDelegate itself, in order to record the statistics, the following method must be added:
IndigitallXamarin.Indigitall.RegisterStatistics(response);8. Changelog
[1.13.1] - 03/2022
Fixes
- Improve the performance of API calls
[1.13.0] - 03/2022
Added
- Delete the HMS libraries to avoid publication problems in the Play Store
[1.12.1] - 01/2022
Fixes
- Add event click to new mtehod of add new inApp click
[1.12.0] - 01/2022
Added
- InApp Dismiss Forever
- InApp utilities (numberOfClicks, numberOfShows)
- Event custom para iurny
- Interruption level iOS
[1.11.5] - 12/2021
Fixes
- Add field to PUT request when push secure is active
[1.11.4] - 12/2021
Fixes
- Open URL action if android OS is 11 or higher
[1.11.3] - 11/2021
Fixes
- Add campaignId on push click
[1.11.2] - 11/2021
Fixes
- Update native libs
[1.11.1] - 10/2021
Fixes
- Device enabled/disabled
[1.11.0] - 10/2021
Added
- Compatibility with Android 12
- Customer Service
[1.10.0] - 09/2021
Added
- InApp click control
[1.9.0] - 07/2021
Added
- Update Huawei libs
[1.8.3] - 07/2021
Fixes
- Initialization without Config as param
Added
- Update Firebase Library
[1.8.1] - 06/2021
Fixes
- Update Huawei libs
[1.8.0] - 05/2021
Added
- New method to send custom event with data
Fixes
- Get Info from devices
[1.7.0] - 05/2021
Added
- InApp show a number of times defined in the console
- Configure domain for Enterprise clients.
[1.6.8] - 04/2021
Added
- PopUp show a number of times defined in the console
- Hide PopUp after a time configured in the console
[1.6.7] - 04/2021
Fixes
- Hide close button popUp
[1.6.6] - 04/2021
Fixes
- Improve logs
[1.6.5] - 04/2021
Fixes
- Improve model inApp
[1.6.4] - 04/2021
Fixes
- Fix action open app inApp
[1.6.2] - 04/2021
Fixes iOS
- Statistics register method
[1.6.1] - 04/2021
Added
- InApp action open app
- InApp show a number of times defined in the console
- PopUp rounded edges (android)
[1.5.13] - 02/2021
Android fixes
- Improve handling of button actions
[1.5.12] - 02/2021
Android fixes
- Improve control in case deviceId has not been generated
- Fix PushNotification class extension in Harmony
[1.5.11] - 02/2021
Corrections
- Improve silent pushes operation
- Fix encrypted push for android older than android 6
[1.5.10] - 02/2021
Corrections
- Force token assignment in the callback device object in HMS
[1.5.9] - 02/2021
Corrections
- Access to the HMSMessagingService Service
[1.5.8] - 01/2021
Corrections
- Force token update due to expiration if not stored in the first instance
[1.5.7] - 01/2021
Corrections
- Correctly display the body in android 6.0 and lower
[1.5.6] - 12/2020
Corrections
- Updated java compilation
[1.5.5] - 12/2020
Corrections
- Location request if the request is launched before initializing the SDK
- Modify the way to raise the app with the open app action due to problems with Xiaomi models
[1.5.4] - 12/2020
Corrections
- Update UIWebView (Deprecated) by WKWebView
[1.5.3] - 11/2020
Corrections
- Stability in requests
- Share action on iPad
- Show buttons in previous notifications
[1.5.2] - 11/2020
Corrections
- Change Huawei dependencies.
[1.5.1] - 11/2020
Corrections
- Fix conflicts with android resources. (HuaweiMaps)
[1.5.0] - 11/2020
Added
- Persistent push
[1.4.8] - 11/2020
Corrections
- Control if empty push object sent via API
[1.4.7] - 11/2020
Corrections
- Wifi info request in background on iOS
[1.4.6] - 10/2020
Corrections
- Escalate popUp and callbacks
- Fix in case the externalCode is null
[1.4.5] - 10/2020
Corrections
- Add custom layout
[1.4.4] - 10/2020
Corrections
- Fix HMS dependencies
[1.4.3] - 10/2020
Corrections
- Push with image for Huawei devices
[1.4.2] - 09/2020
Corrections
- Fit popup to device screen size
[1.4.1] - 08/2020
Corrections
- Add Huawei location dependency
[1.4.0] - 08/2020
Added
- Huawei Mobile Services
- Huawei location service
- Open *.pkpass files
[1.3.0] - 05/2020
Added
- InApp and Popup
- wifi filter
- Popup customizable icon
[1.2.0] - 03/2020
Added
- Inapp and device functionalities.