Salesforce Marketing Cloud integration
quick guide to integration of the indigitall connector for Salesforce Marketing Cloud
Index
What do you need for integration?
- Create Salesforce Marketing Cloud Account
- Create an account of indigitall
- Create a project in your indigitall account
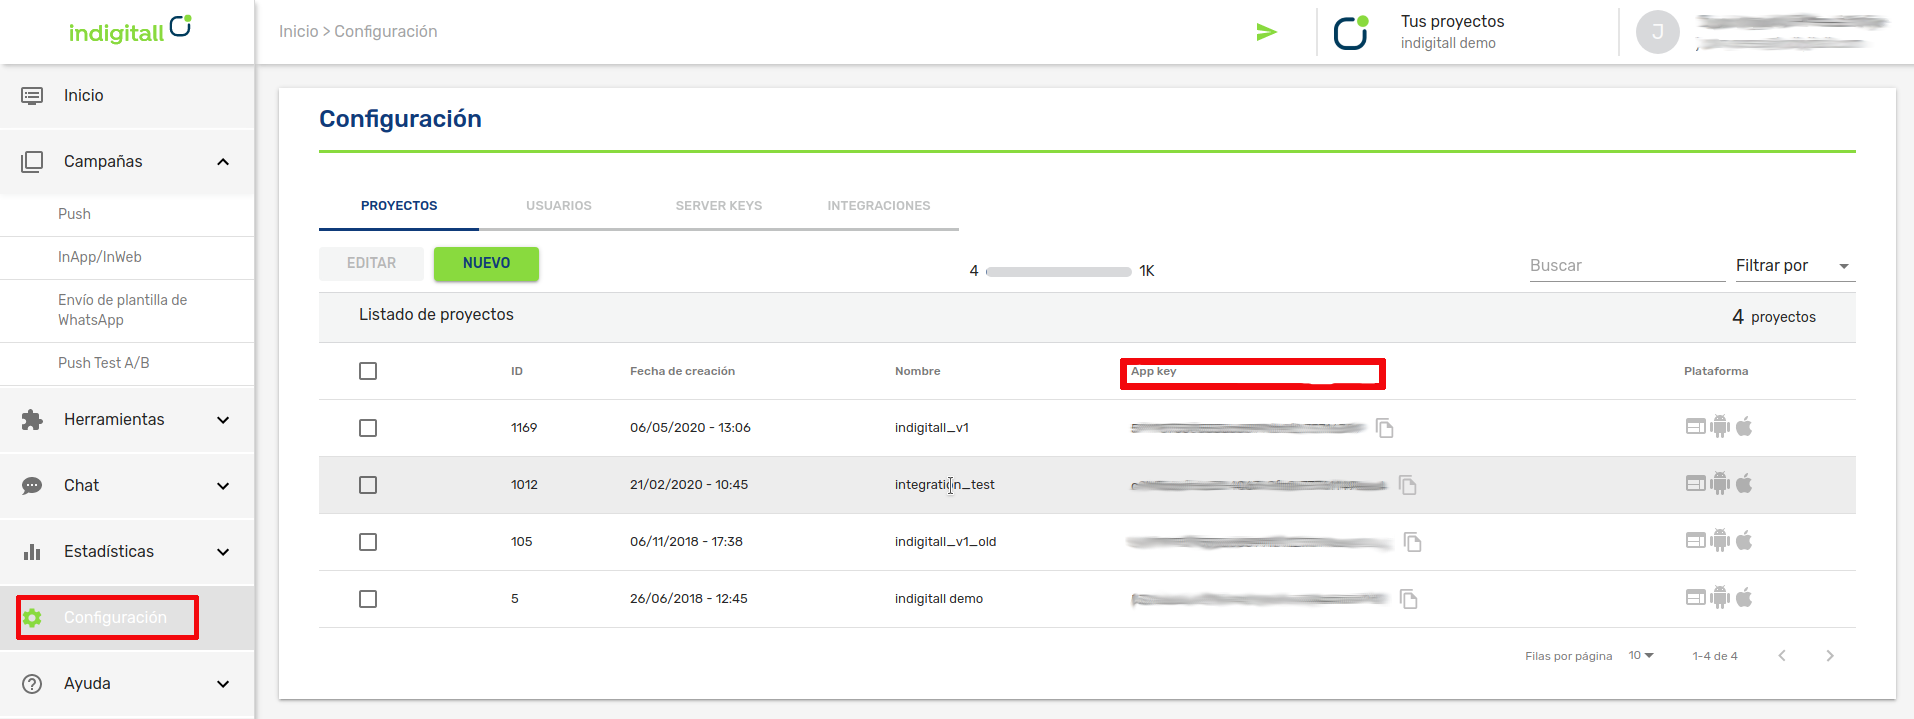
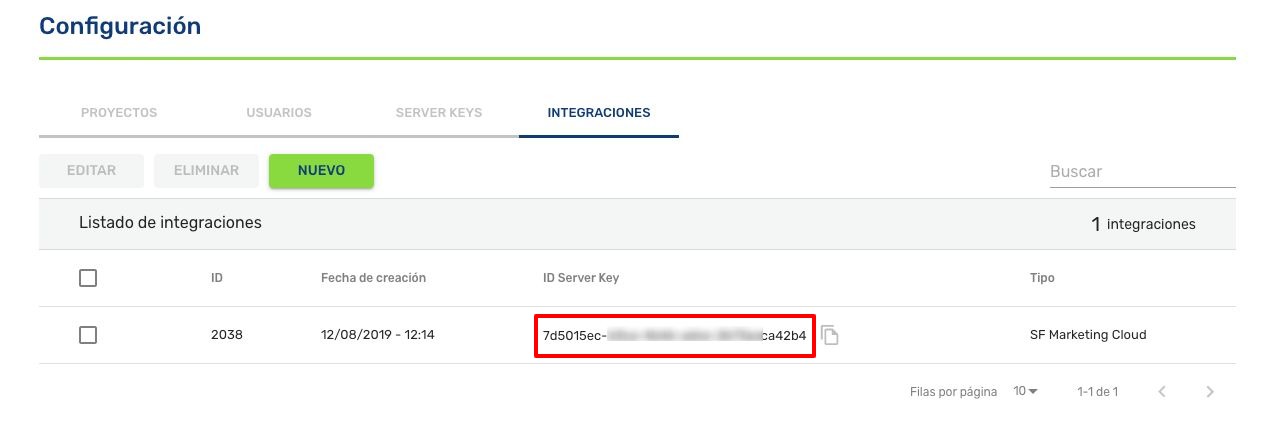
You will need the App Key of the project, which is the key that our system uses to identify it, so it is unique for each project. You can find it in the administration console within the Configuration section in the Projects tab. You can see it in the following image, and to copy it, it is easy to click on the icon next to the key (App Key)
Adding a new package
Create a new package in your Marketing Cloud account to connect indigitall with Marketing Cloud as follows:
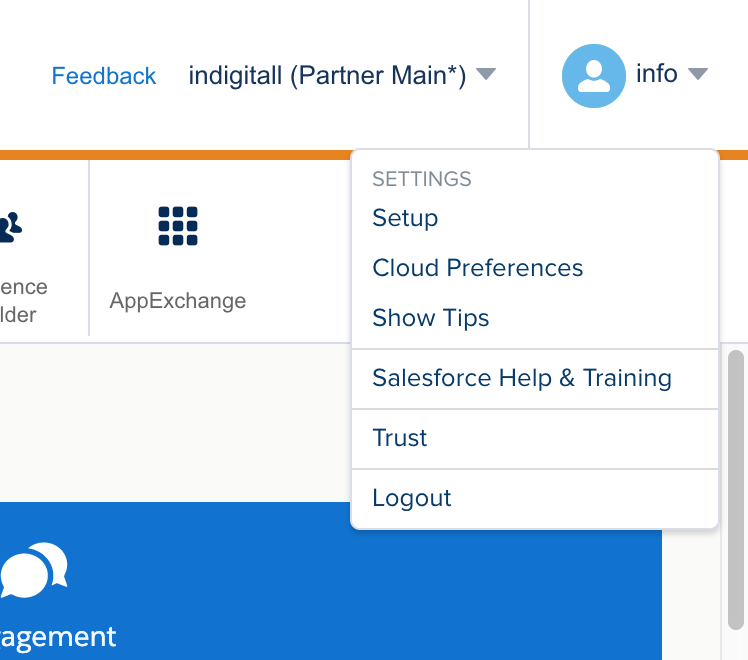
1 - Go to the Setup section, you can see it by placing the mouse over the name of your user.
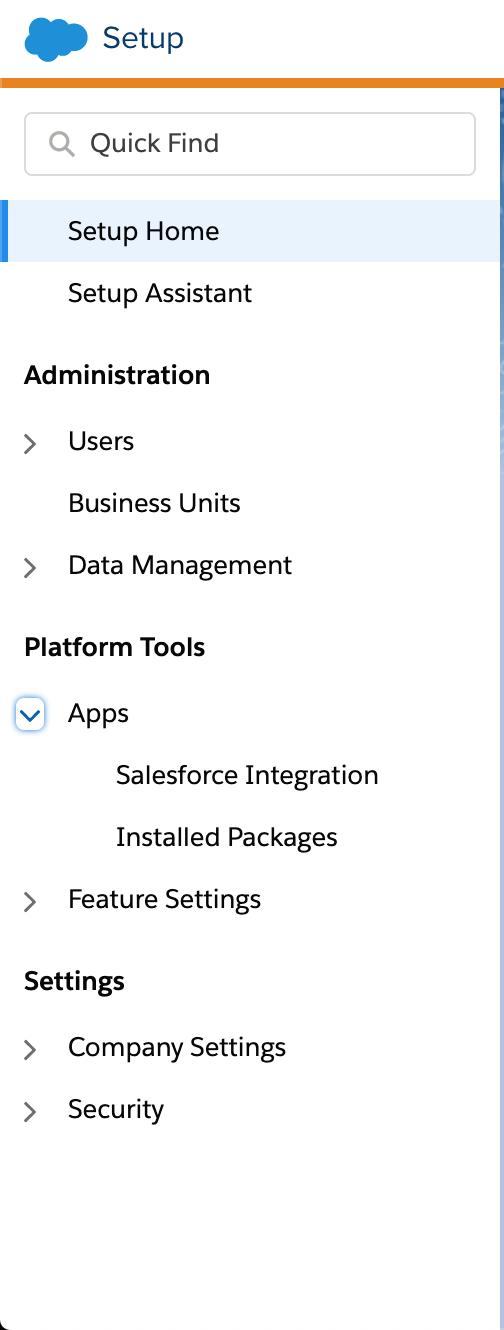
2 - In the side menu, click on the option Installed Packages within Platform Tools> Apps.
3 - Now you can click on the New button to create your package.

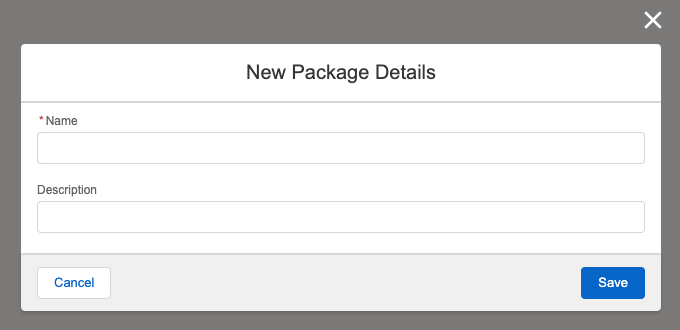
4 - Write "indigitall" as the name of the package and click on the Save button.
5 - Click on the "Add Component" button to add a new component to your package.

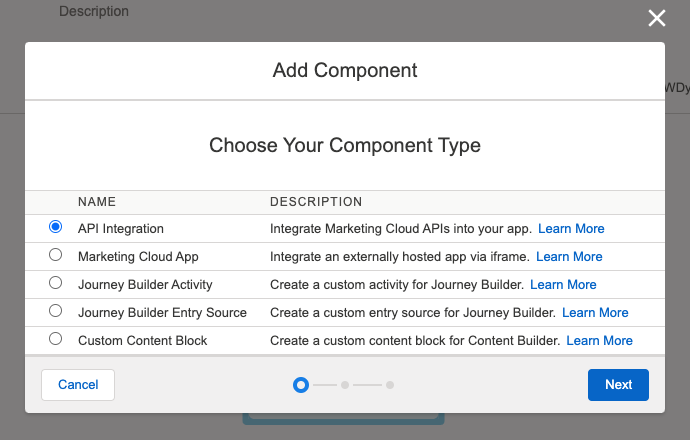
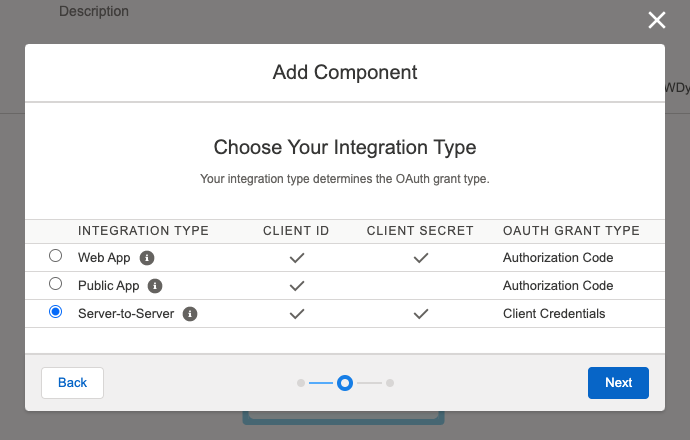
6 - Select "API integration" and then "Server-to-Server".
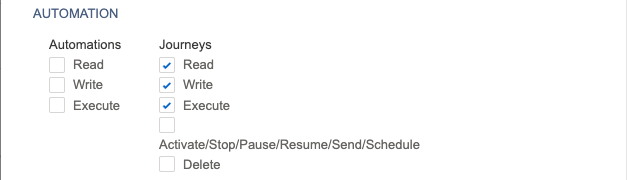
7 - Set up the permissions..
Check the following permissions before finalizing:

The result should be something like this:
8 - Now add a new component of type "Marketing Cloud App".
Configure it with the following values:
Name: indigitall
Login Endpoint: https://salesforce.indigitall.com/integration
Logout Endpoint: https://salesforce.indigitall.com/logout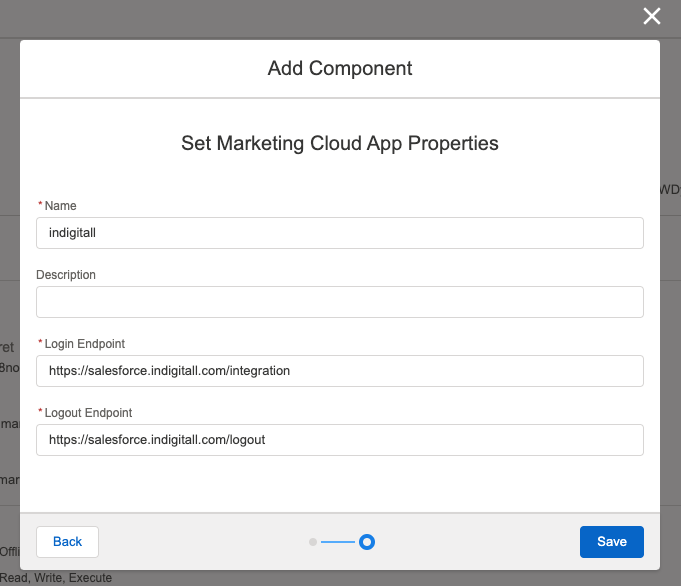
9 - Finally, add the Journey Builder Activity of the services you are going to use from indigitall.
- For the Push service:
Name: Push indigitall
Category: Messages
Endpoint URL: https://salesforce.indigitall.com/push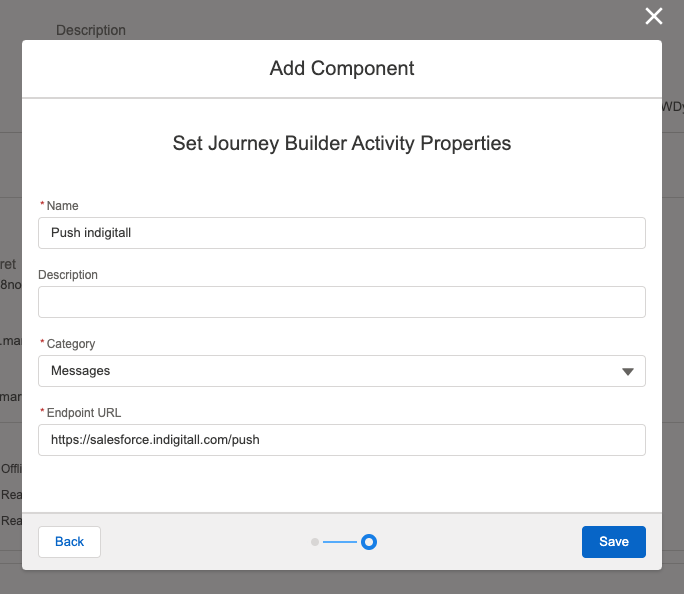
- For the Chat service:
Name: Chat indigitall
Category: Messages
Endpoint URL: https://salesforce.indigitall.com/chat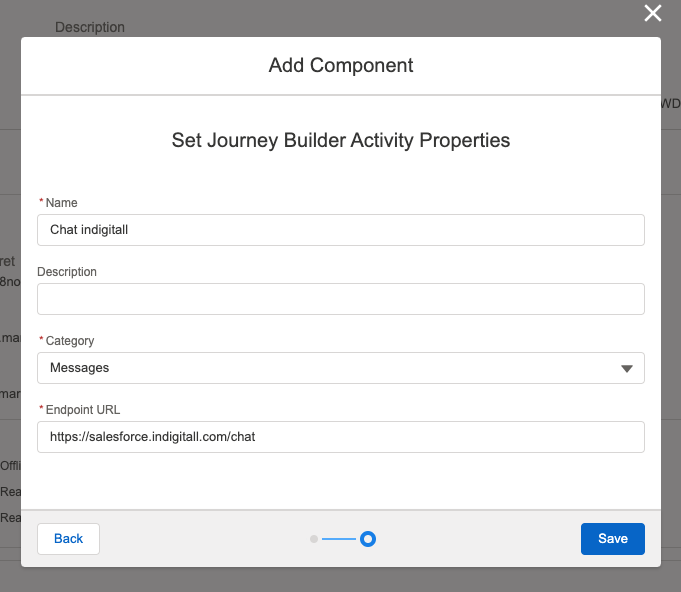
Integration with indigitall
Now you will have to perform the integration with indigitall. For this, go to the [indigitall console] (https://console.indigitall.com) and login.
Inside, go to the "Settings" and, in the "Integrations" tab, press the "New" button. You will see the following screen:
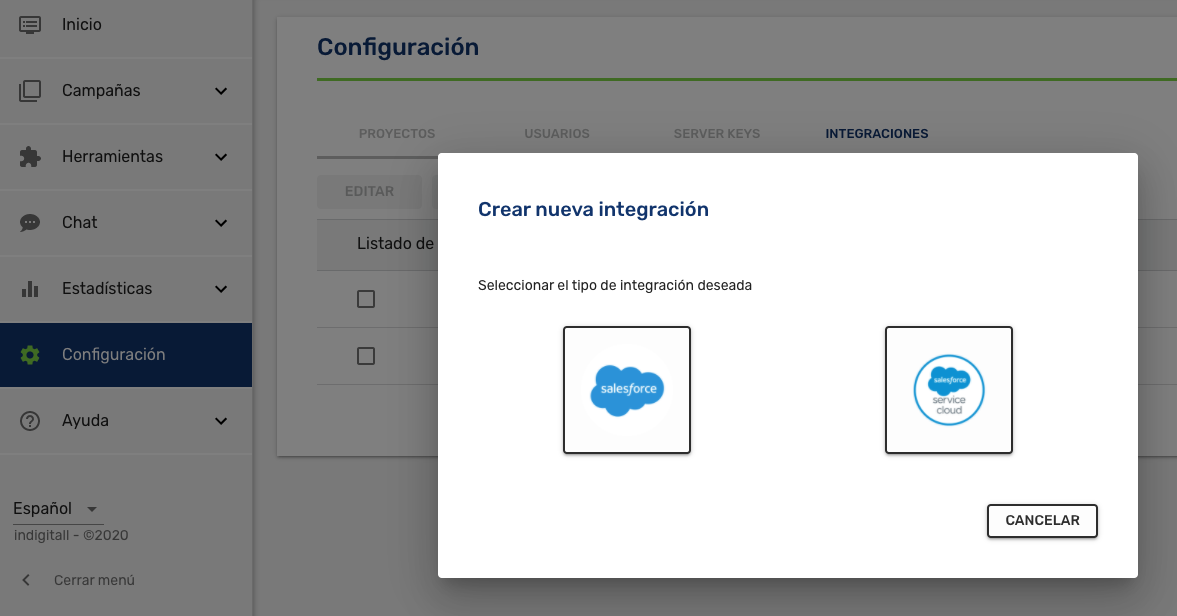
Select the first option. You will have to fill in the following information:
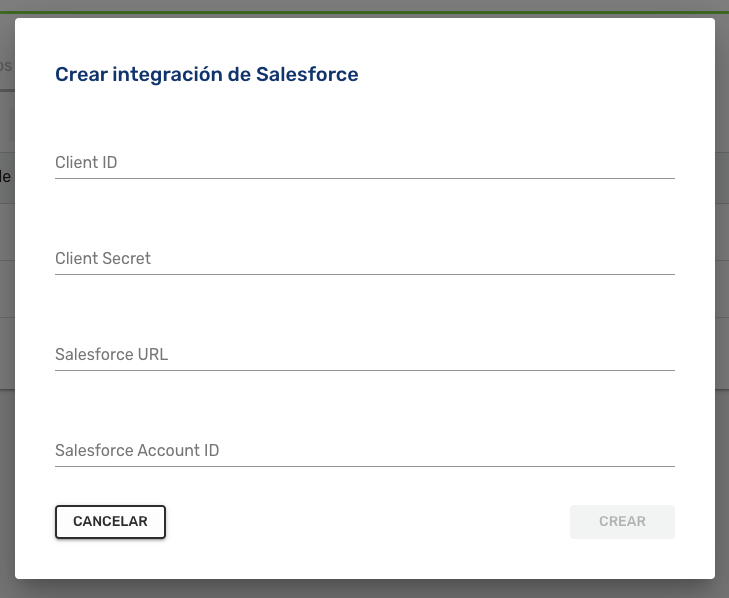
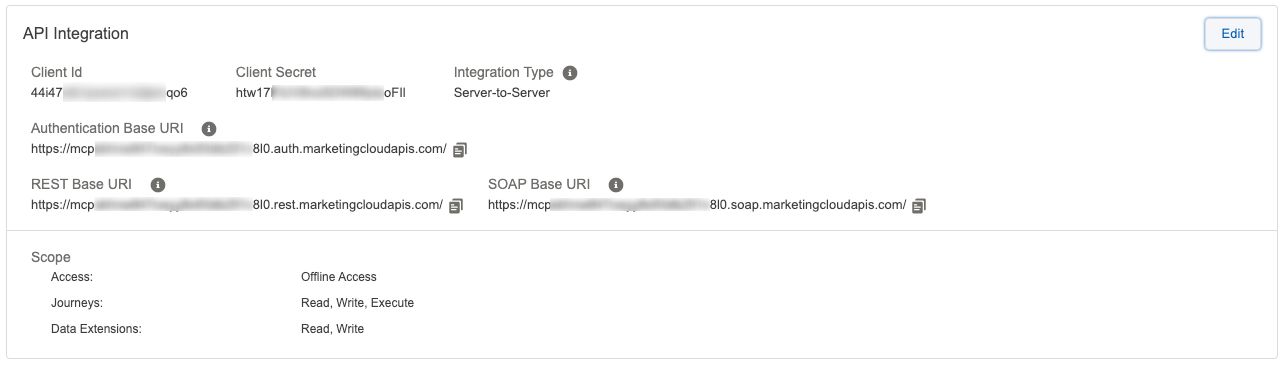
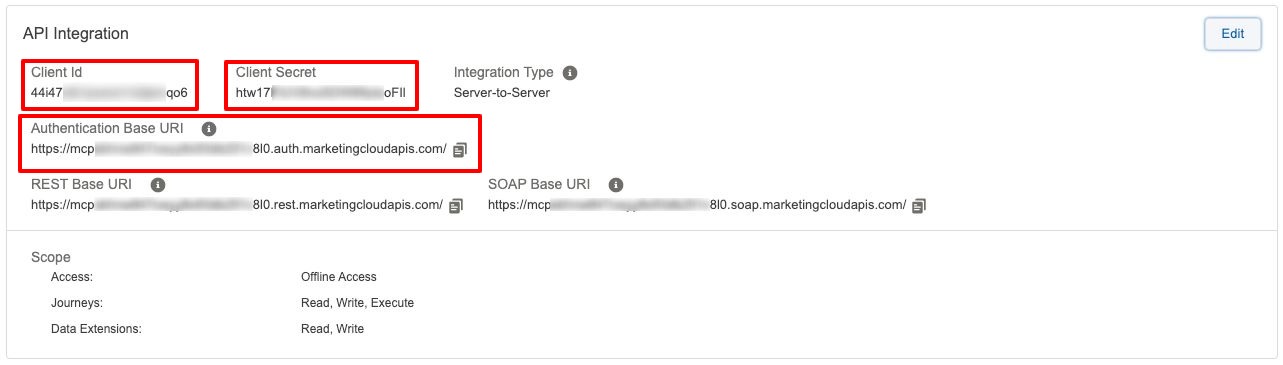
Within the package that we have created in Salesforce Marketing Cloud you can see several of this data. From here you can collect the following: Client Id, Client Secret and Authentication Base URI (Salesforce URL).
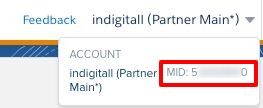
If you place the mouse over the name of your account you will see the missing data: MID (Salesforce Account Id).
With all this you can generate a "Server Key" of indigitall. Which will allow Salesforce Marketing Cloud to communicate with our services. Copy the generated key.
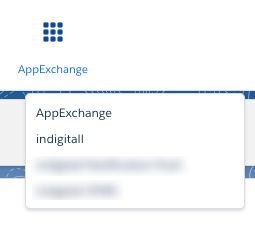
Returning to your Marketing Cloud account, you will now have a new option in the AppExchange menu (if not, reload the page) called "indigitall". Click on this to finish configuring the indigitall connector.
In this new screen you will see a form with two fields:
- ServerKey: Here you must include the ServerKey generated in indigitall and that you had copied.
- Data extensions: This field is optional and serves to speed up the search for information for the service. If you are clear about the Data Extension that you are going to use as a data source, indicate them here (you can add as many as you want).
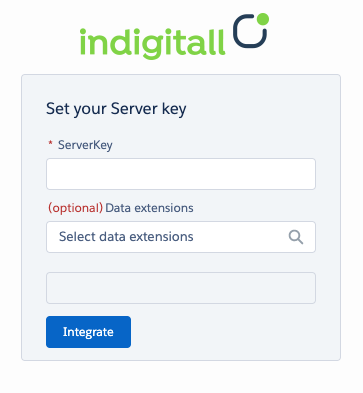
Once you click on the "Integrate" button you will have completed the configuration.
Link contacIds with deviceIds
1 - Access "Contact Builder" from "Audience Builder" on the SalesForce main screen
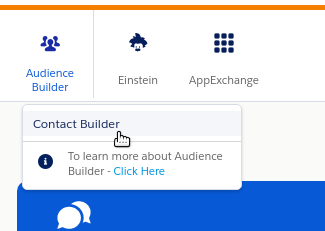
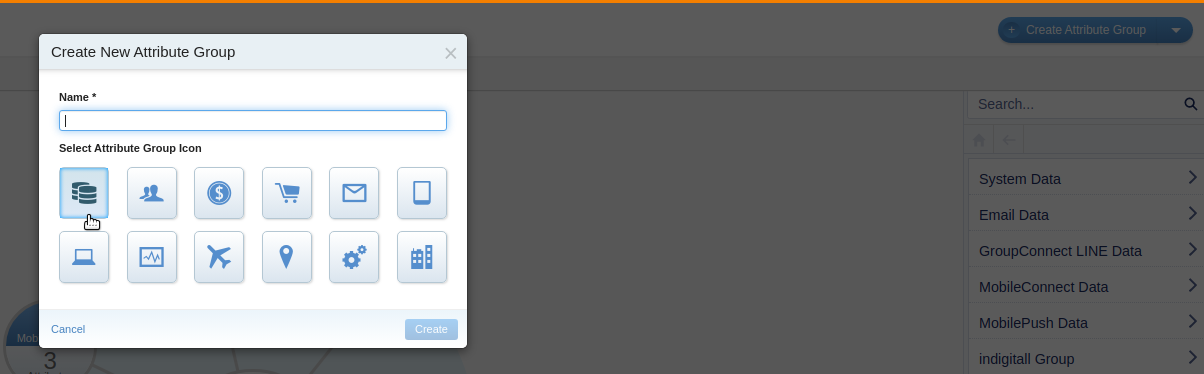
2 - If you don't have any group, you can create one doing click on "Create Attribute Group"
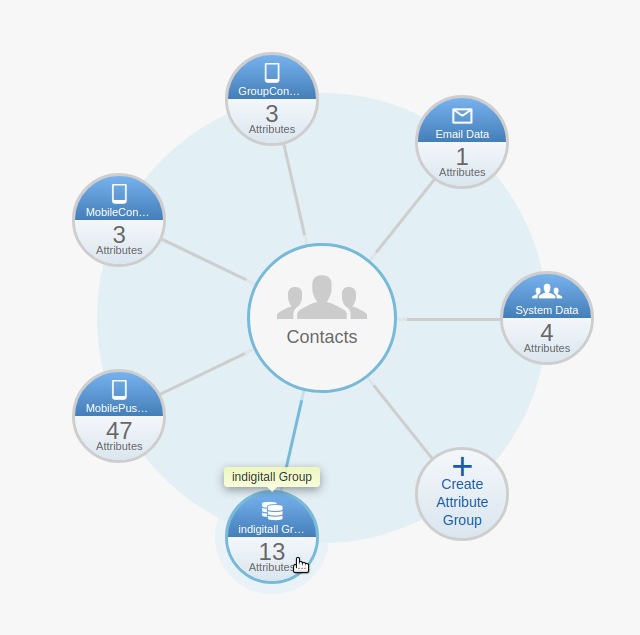
If you already have one created, access from the radial menu
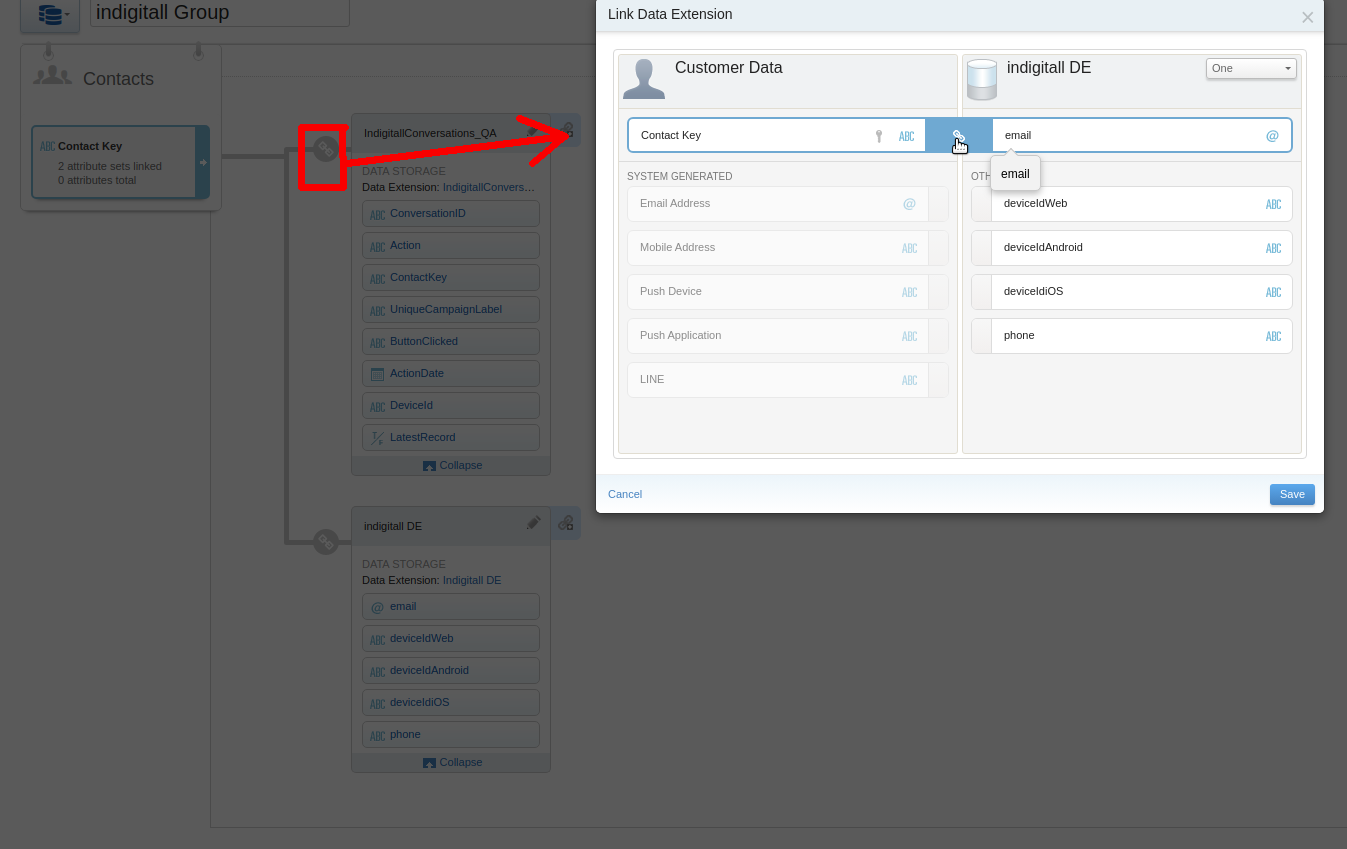
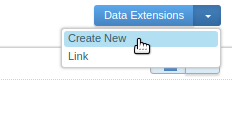
3 - within the group use the button to link your Data Extension with the "Indigitall Conversation" Data Extension through the Contact_Id attribute
If you don't have any data extension created, create one with the contact_id and device_id attributes
If you already have it, you can link the contact_id attribute of your Customer Data with the same one of the dataextension where you have the devices